Hi friends. I’m new to using Gaea. I’ve been watching hours of tutorials and I actually kind of get what I’m doing. But I wanted to try using real geographical map data. This has been extremely challenging and I have had no success unfortunately. I’ve used both US GIS web source and also European Copernicus data, but no matter how I import it into the program, it comes out as a flat white plane with nothing on it. Wondering if anyone has a guide on how to get set up doing this? It seems like it should be very simple.
I basically go to my chosen GIS platform and find a small area, like 8 km for example, export it as DEM, digital elevation map, and make sure that it is a tif output. For Copernicus however, it seems that it exports it as a .tiff, with two fs. I’m not sure why that is. I was able to drag it into the graph but not able to find it in the import menu
Curious if anyone has tried with real elevation data and this is what I really want to learn because I think it’s so fascinating
GIS data has additional data embedded into the files. Usually when you’re using the software it either gives you the data range or you have to convert in GIS the data range so it it is above 0 otherwise Gaea will just cut everything below it.
It’s best to think of it as
Gis source map
Prepare data, export then import into garage, and set Gaea’s terrain Def accordingly.
Some additional links might help
Well worth looking in our archives as well.
As there was discussion on it albeit it a messy.
Genuinely I recommend focus on the GiS workflows first to get it imported so to not get overwhelmed.
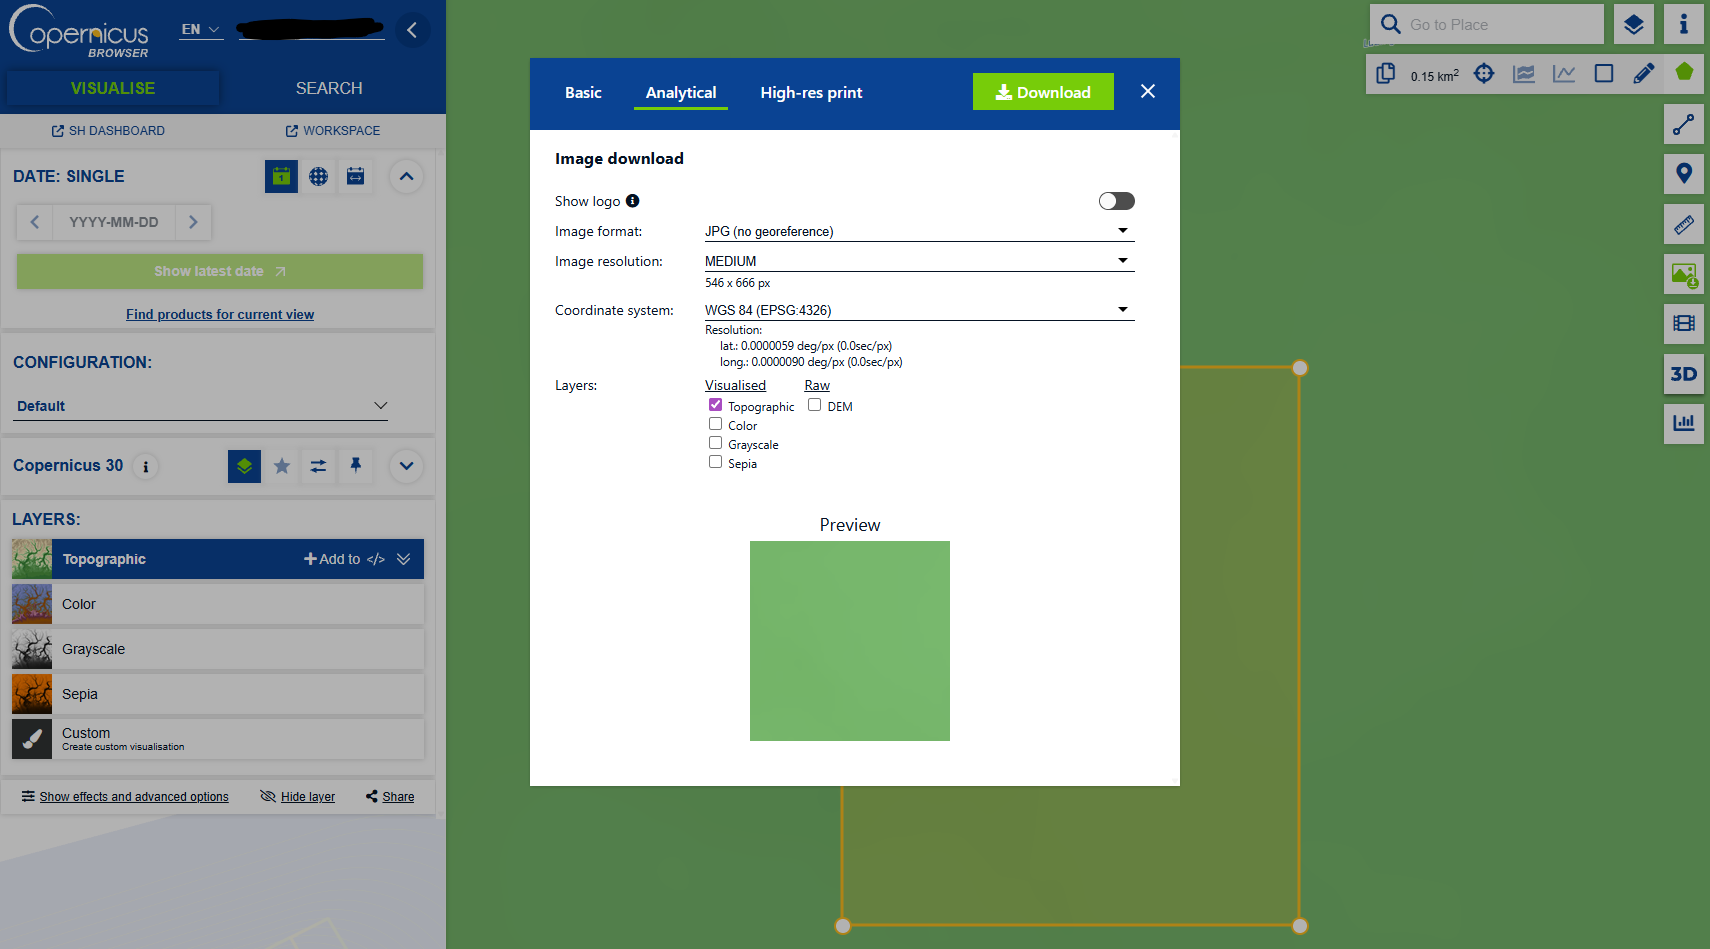
Thank you Ty. This is really helpful and all review all these. Do you know of any video tutorials that anyone has done for this exact workflow / operation? To be specific I’m not trying to do anything too crazy. I’m basically doing a simple export of a region through Copernicus (https://browser.dataspace.copernicus.eu/)
I think it could be neat/helpful to have a very simple/elementary example on the Quadspinner YouTube channel, if that’s at all possible?
That would be rad and appreciated. I went through the links above to start testing, and learned a few interesting things.
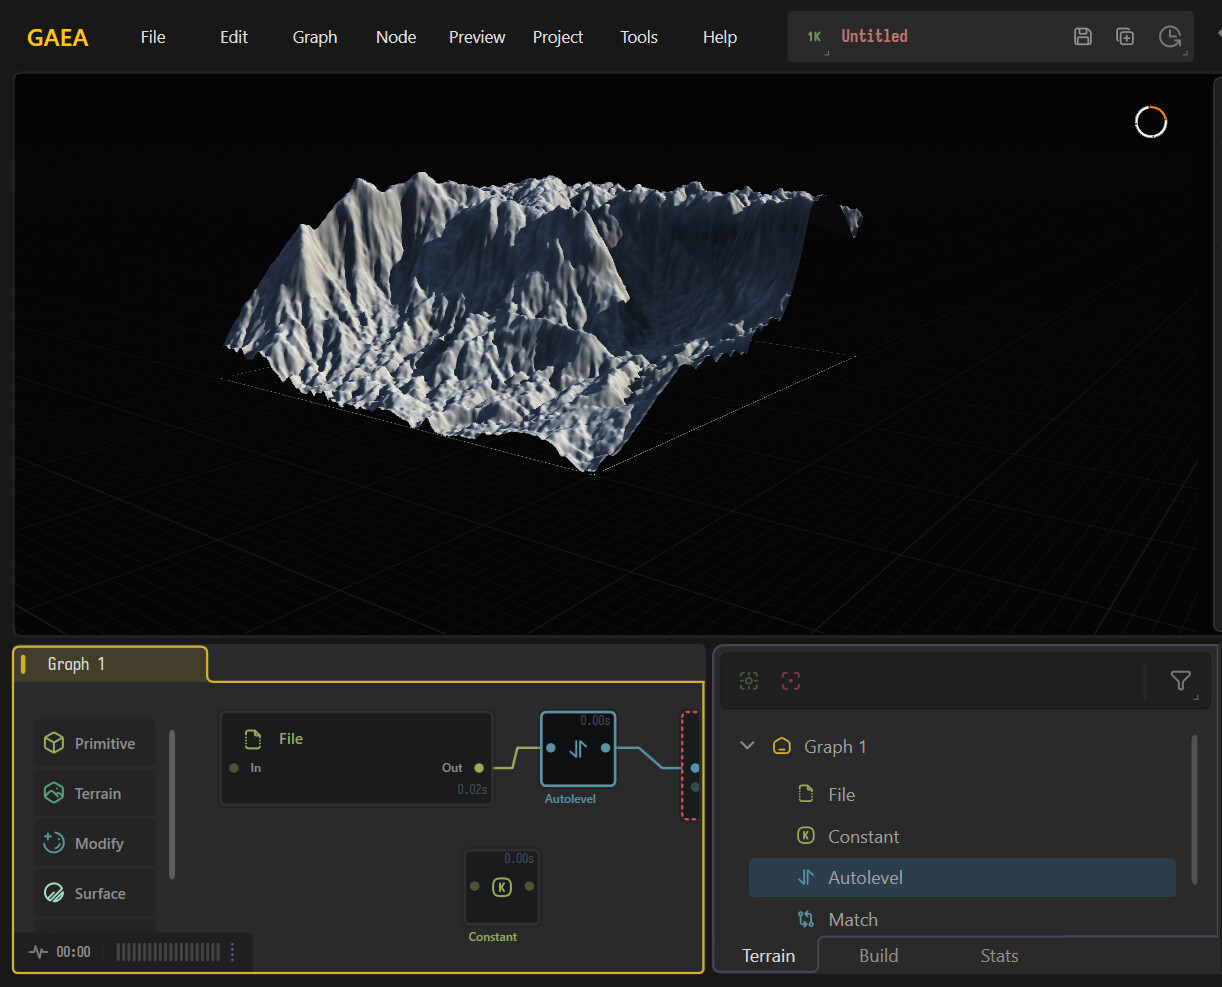
First, the ‘constant’ node won’t let me put in an actual number like 2100m. It seems to be rooted at 0 to 1 decimal range. I’m unsure how to fix that.
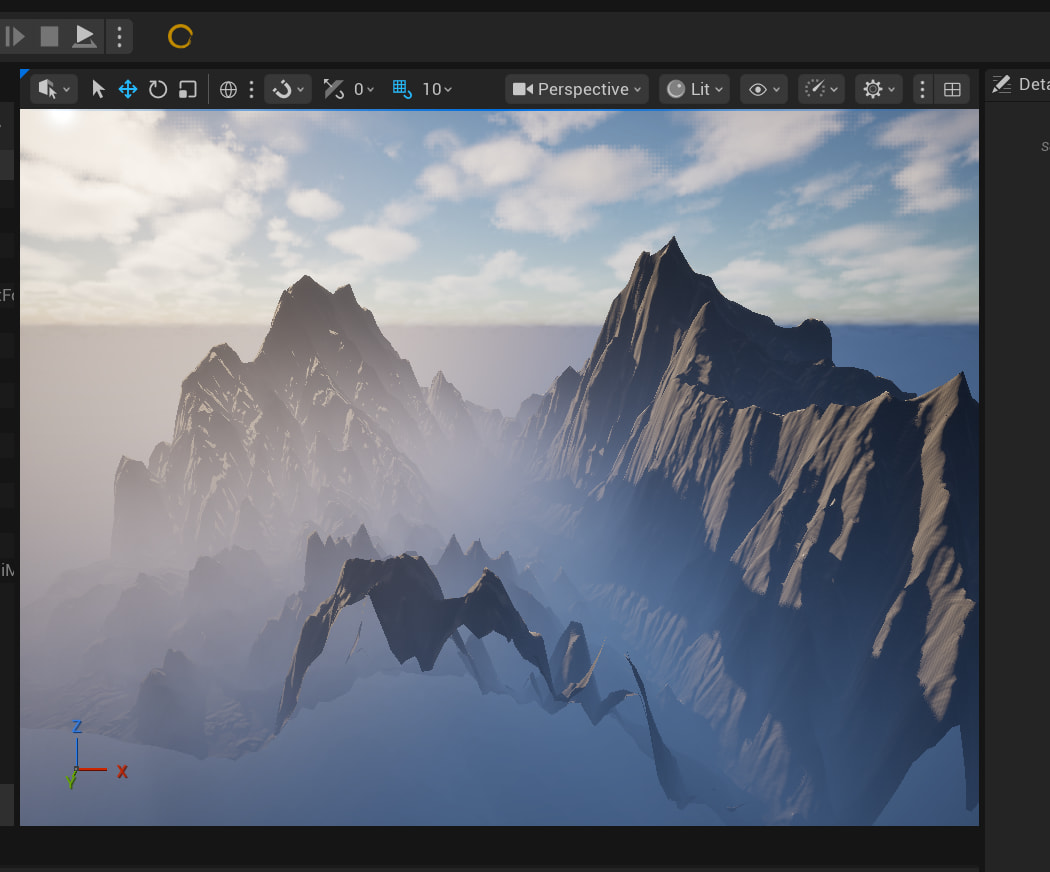
The Autolevels node worked really well, but the terrain is kinda huge now and has tons of large spikes. Still trying to verify if those are the right proportions
I can’t really hook up the match to the constant. No matter what I set the constant to, it just flattens out the entire terrain to just nothing, even though the autolevels raised it to realistic proportions. Very strange!
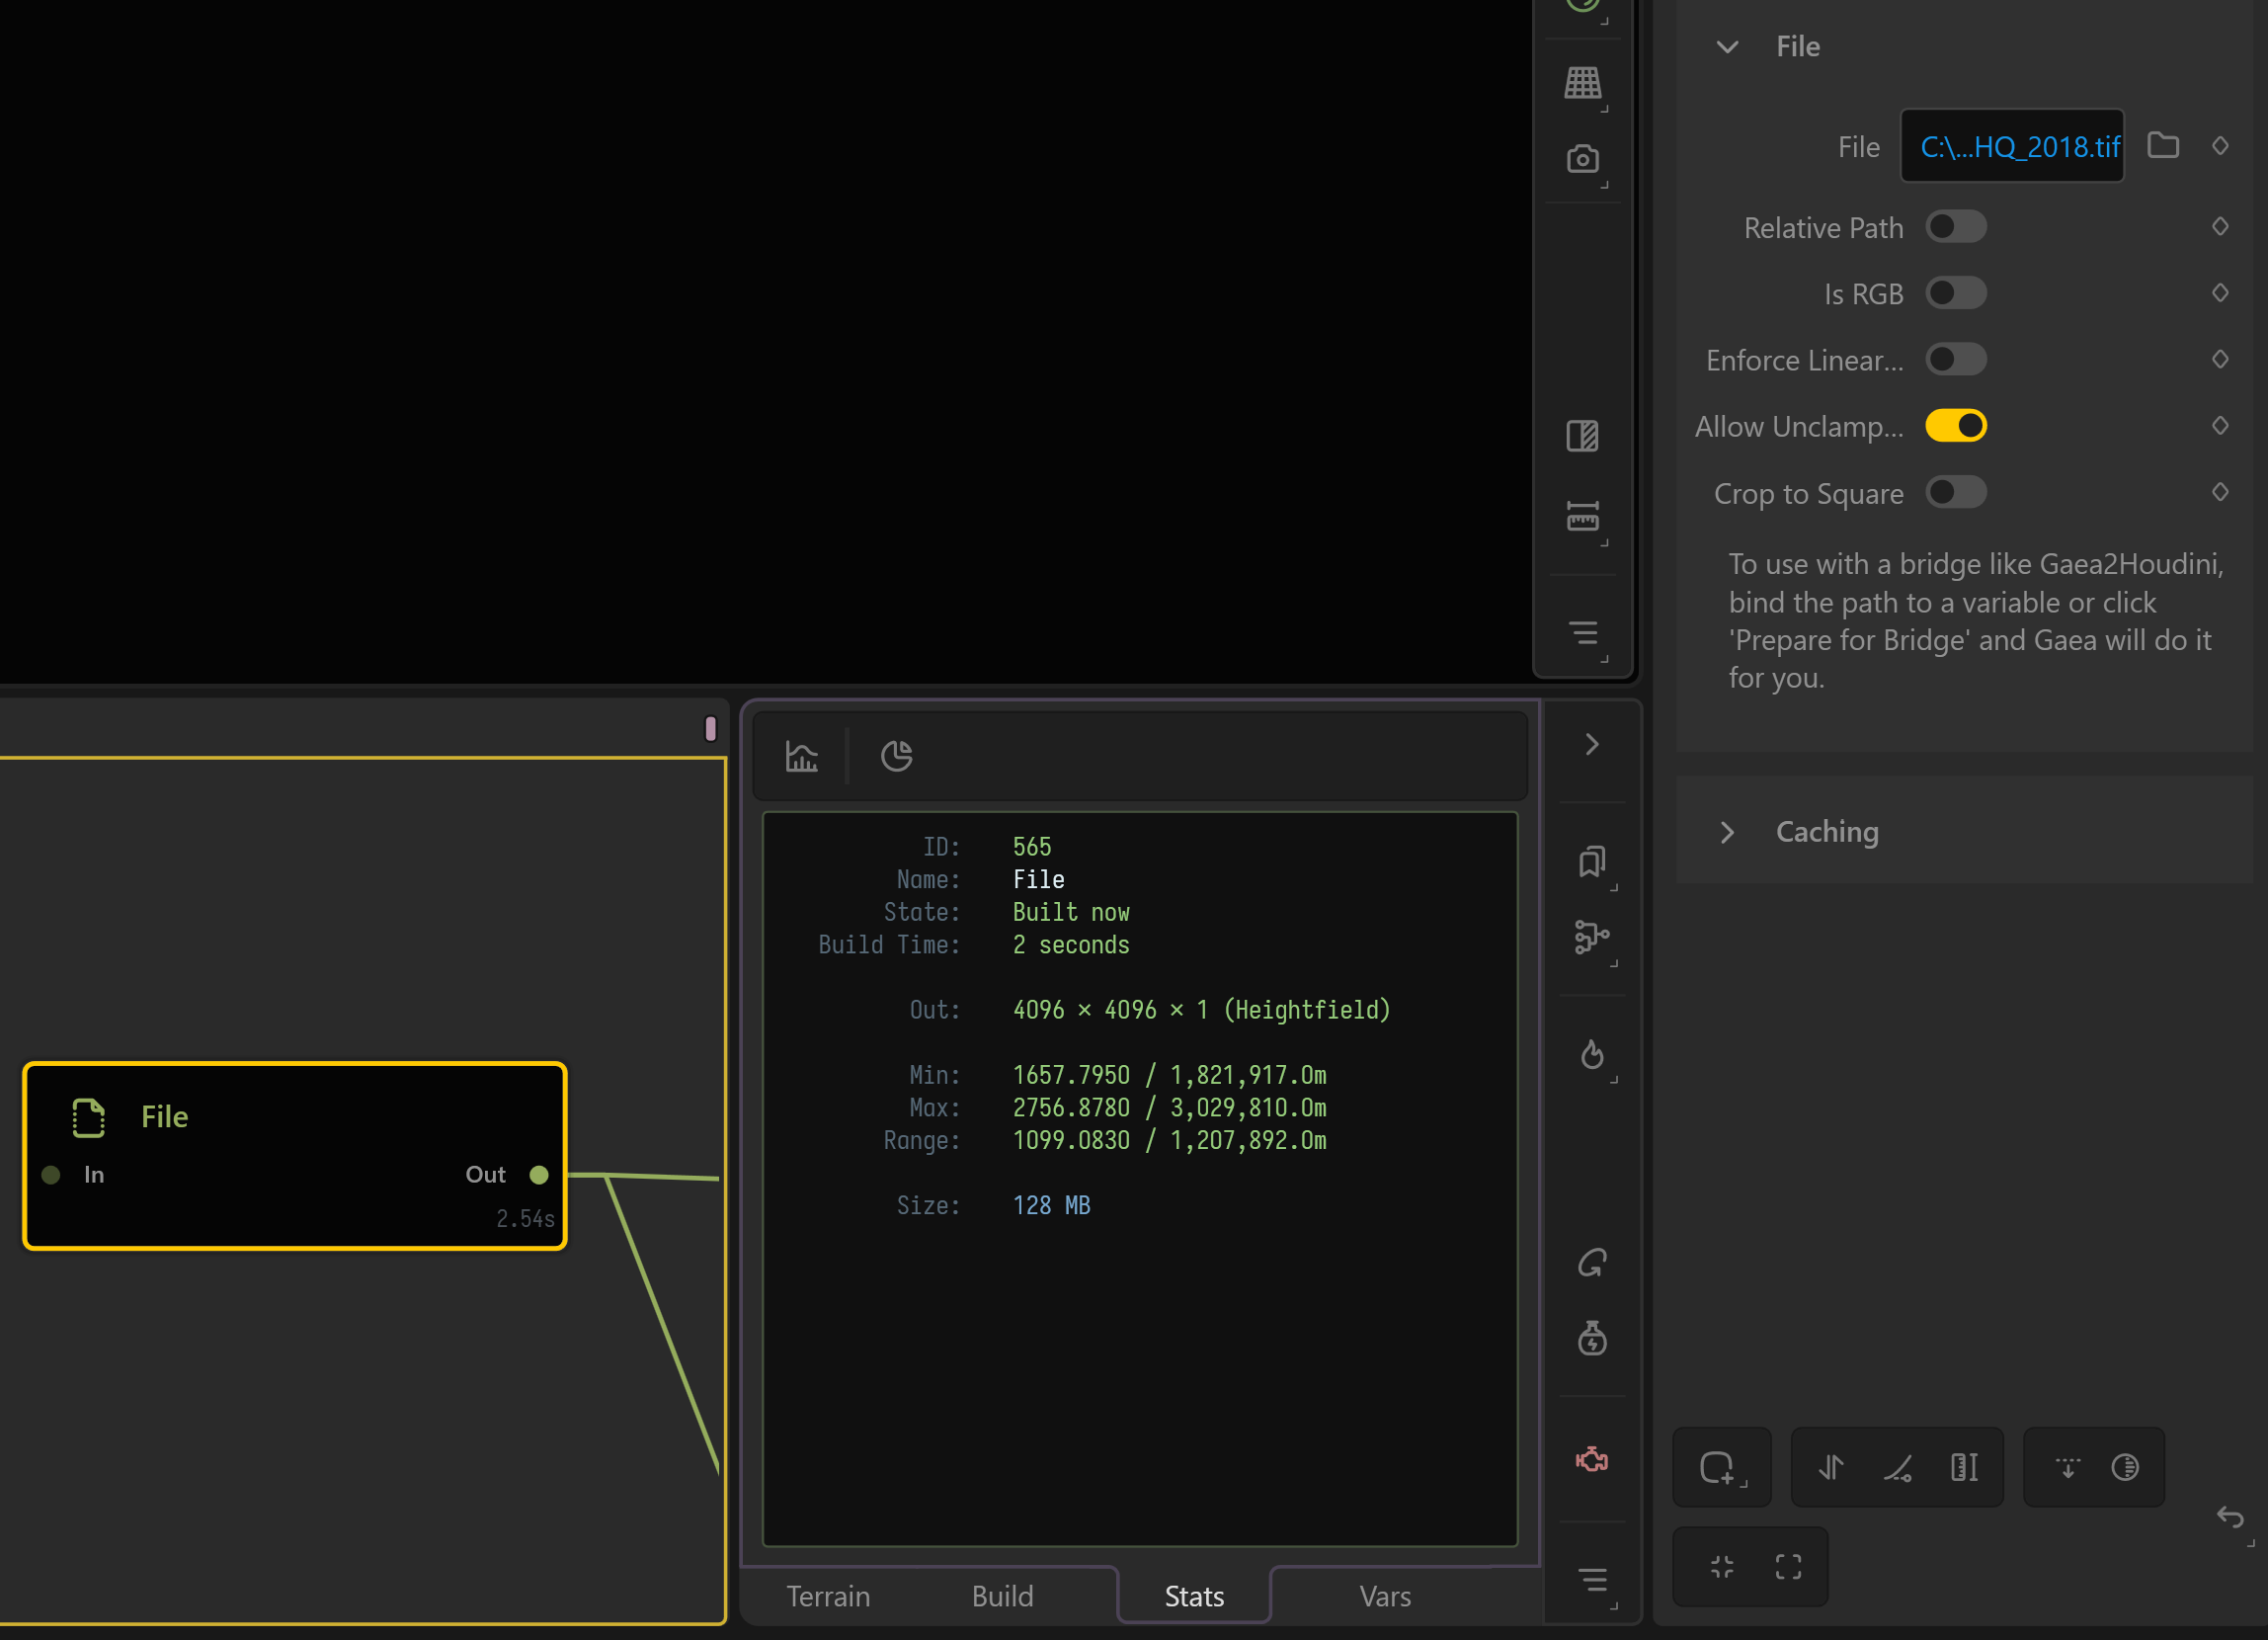
Qgis was really helpful in importing a .tif file, and getting the range of height, it shows a clear minimum and max value.
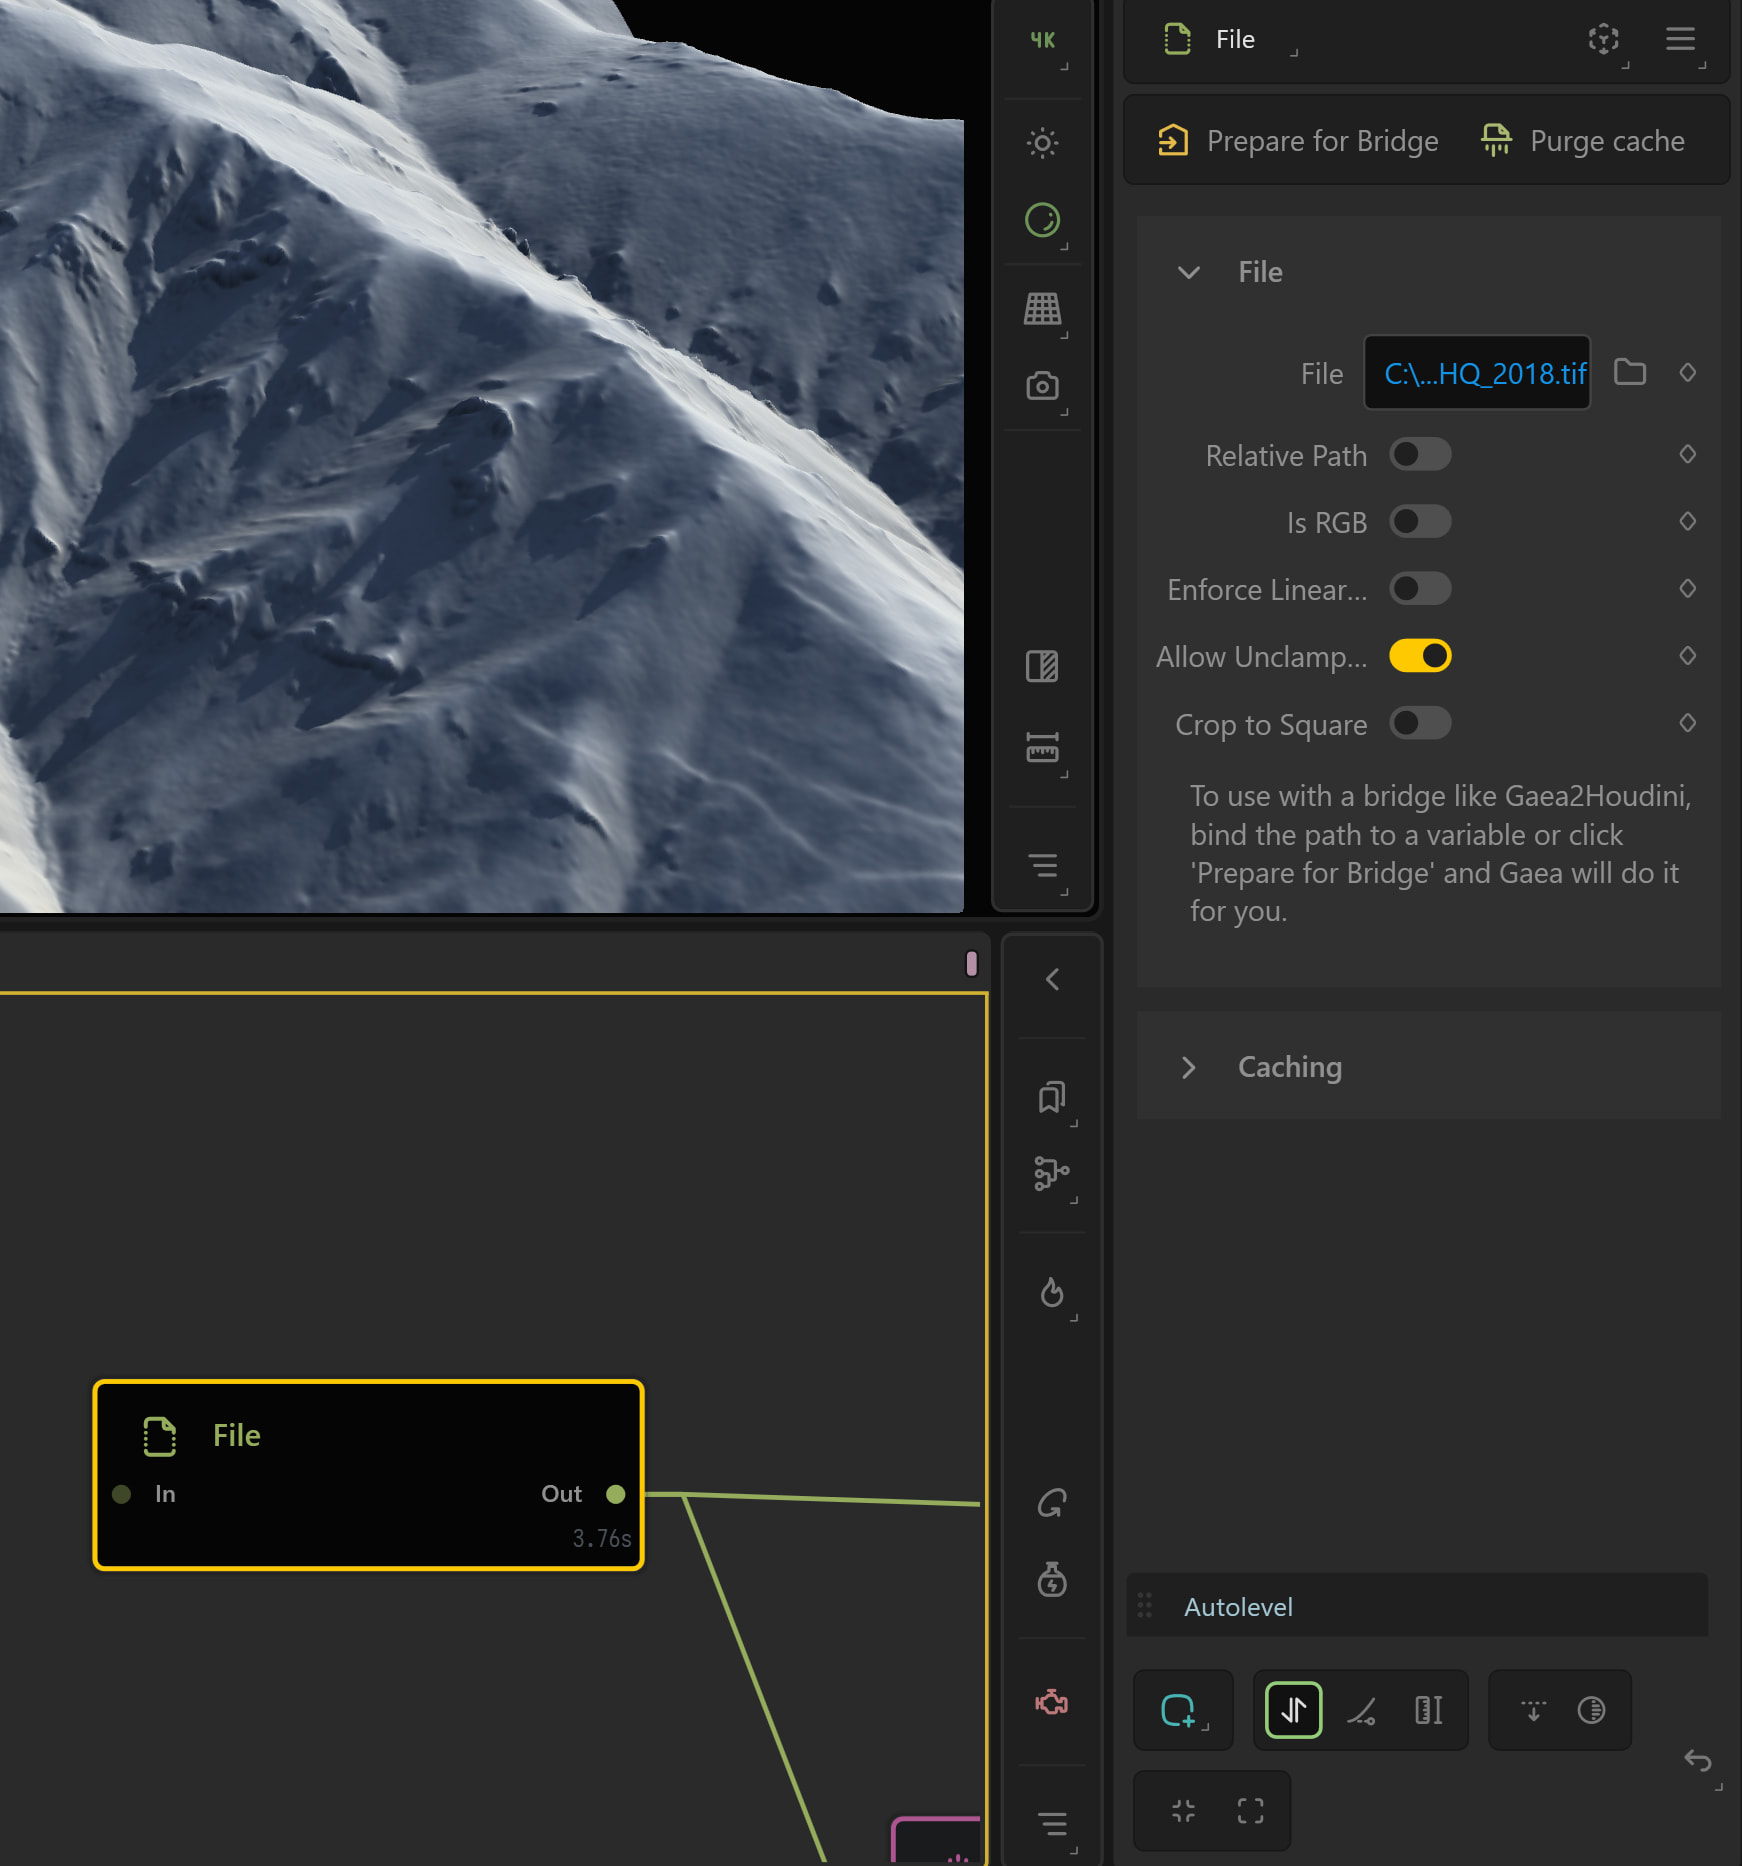
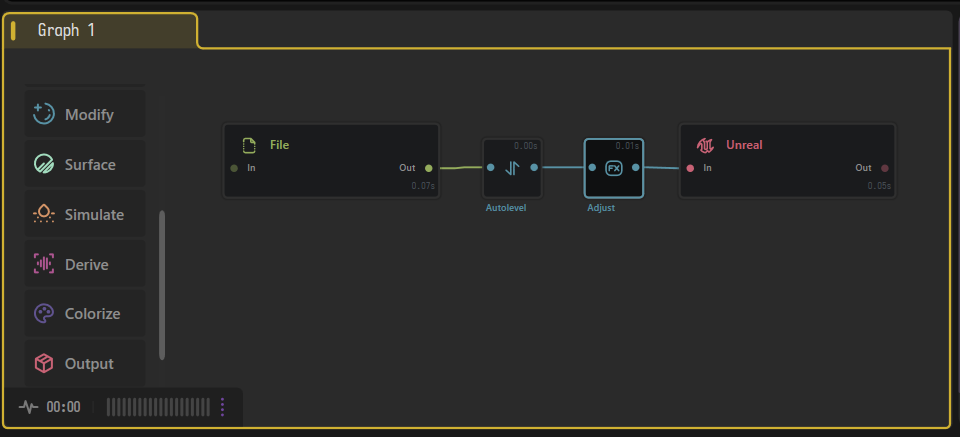
The .tif is in 32 bits, allowing for the elevation values to be stored in real world meters most likely. These values will exceed the 0-1 range, which is why you are getting a maxed out white plane.
What you need to do is check “Allow Unclamped” on the File node options. (the terrain will disappear, but it’s actually way up in the air if you zoom out)
Then auto level after that to bring it back down to the 0-1 range, and will then be visually scaled to the your Terrain Definition dimensions
Many properties support math expression and scale units but you also have to ensure your Terrain Definition cover the height range too, otherwise it’ll be 1 if you go over the max value ( unless max is the value of course)
Press Ctrl + B then Terrain Definition to set your height and scale for your project .
This again may require a terrain definition that matches the actual range of the heightfield.
For example if it is -300 - 600
and your Terrain Def height is 900 then Auto leveling should make it the right scale.
Otherwise you may only need to auto level at the end ( and normalising data only once if using tile building)
I will confirm as wellas this has been brought up before and I recall testing it myself once with the same result.
This month I am working in additional guides for docs so it’s well worth me checking it over.
I’m glad that you’ve spent the time in QGIS and found the information to help you get this far so far! That’s very good.
I believe this is correct. I sourced the data from both USGIS, and Copernicus Europe data. These are public providers of digital elevation maps, although I’m not very well versed in the many facets of their data. They have DEM30, DEM90, and more.
thank you for the detailed walkthrough. this was a huge help.
@TyXanders do you have any advice or documentation you’d recommend on what to set the height and width to in the project settings once you have the range? Like for example if QGIS gives me 200M minimum and 2700M Maximum, for simplicity. Does this mean I set the height to that exact 2700M?
Your width is your data set’s resolution multiplied by your heighmap’s resolution.
For example, if you are working with 30 meter per pixel data, and your heightmap is 5,000 px, you know that area is roughly 150 km wide.
Your height is the range of the min and max. If the lowest point in that area is 200m, and the highest is 2,700 you want Gaea to represent a height range of 2,500m.
Select the last node before the unreal node, and press ‘F5’ to force a Node Preview Build. This seemed to fix my workflow, and strange error “data is incorrect”, and allowed me to build
Build (Ctrl+Shift+B)
Importing in Unreal Engine 5
Open Unreal Engine, and create a new level - I do this just to ensure I don’t ruin my current level somehow, just to test it first
Press the yellow ‘Gaea’ button on the top toolbar
Press ‘import heightmap button’ and then, select the heightmap from the build folder.
It does depend on your end goal as well.
in this case it’s likely a worfklow benefit.
You can work 1:1 the entire time, this means the definition and the scope of your terrain match.
This does work well for unreal workflows too since the data is normalised.
That basic rule for a GIS > Unreal Workflow:
Match the terrain definition to the DEM if you want real-world scale.
Use the min/max difference for height, not the absolute maximum elevation.
Use the minimum elevation as an offset only if you need correct world altitude.
If you need a larger world later, expand the data or tile it rather than simply scaling the same heightmap up.
You can try Gaea > Unreal by default if you want:
In Gaea
new project
add mountain
add unreal node
buid
In Unreal
open Gaea2Unreal
add heightfield you just exported
import
You should see that the import is the same as the Mountain node and not the normalised Unreal node in this instance.
James is describing this 1:1 workflow where the terrain definition matches the real-world dataset:
So, if your source data is 30 m per pixel and your heightmap is 5000 px wide, then the terrain covers roughly:
30 * 5000 = 150,000 m
Your Gaea terrain scale would be about 150 km wide.
Then the height would be the elevation range:
2700 - 200 = 2500 m
So your terrain definition would be something like:
Scale / width: roughly 150 km Height: 2500 m
That keeps the terrain working at the same real-world proportions as the DEM data.
The only thing to keep in mind is that the 200 m minimum elevation is now an offset, not part of the height range itself you shoudl be able see this in the Stats section of the**Data View**. If you only care about the shape of the terrain, that offset may not matter.
But if you want the terrain to sit at the correct real-world altitude in Unreal, you will likely need to account for it separately somewhen down the pipeline.
[!cite] TLDR
There is no hard rule to say that you have to match DEM ( or any data ) to Terrain Definnition, but in this workflows case, it does make the whole pipeline more streamlined, as if you get it right the first time into gaea, you no longer need to think about it and you should know any values for properties off hand.